How to Install Topgreener’s GaN Technology Desk Grommet

In this blog, we’re diving into a simple yet often overlooked aspect of workspace organization – installing a desk grommet. Desk grommets are crucial components that ensure a tidy, clutter-free desk by offering an effective solution for managing those unruly cables from your electronics.
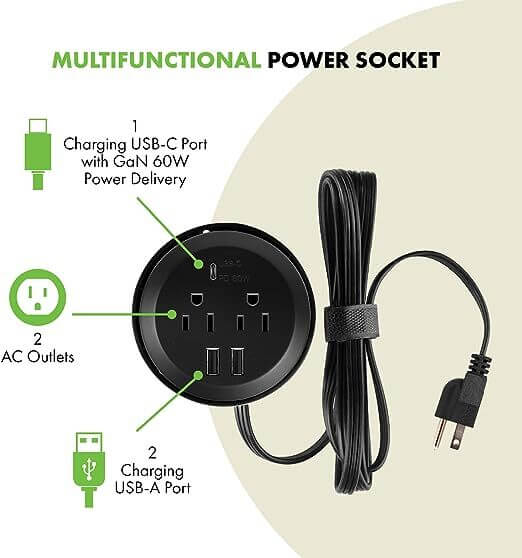
Topgreener’s desk grommet in particular has powerful GaN technology that makes for powerful and quick USB charging. Whether you’re setting up a new home office, tidying up an existing one, or just love learning handy DIY skills, this guide will take you step-by-step through the process of installing a desk grommet like a pro.
Let’s say goodbye to cable chaos and transform your desk into an organized, efficient workspace.
Step 1: Gather Your Tools
Make sure you have the necessary tools for this DIY project. Remember that safety is a priority, so safety glasses are essential. A tape measure, pencil, drill, masking tape, and bi-metal T3 hole saw to cut the grommet shape out are also requirements.
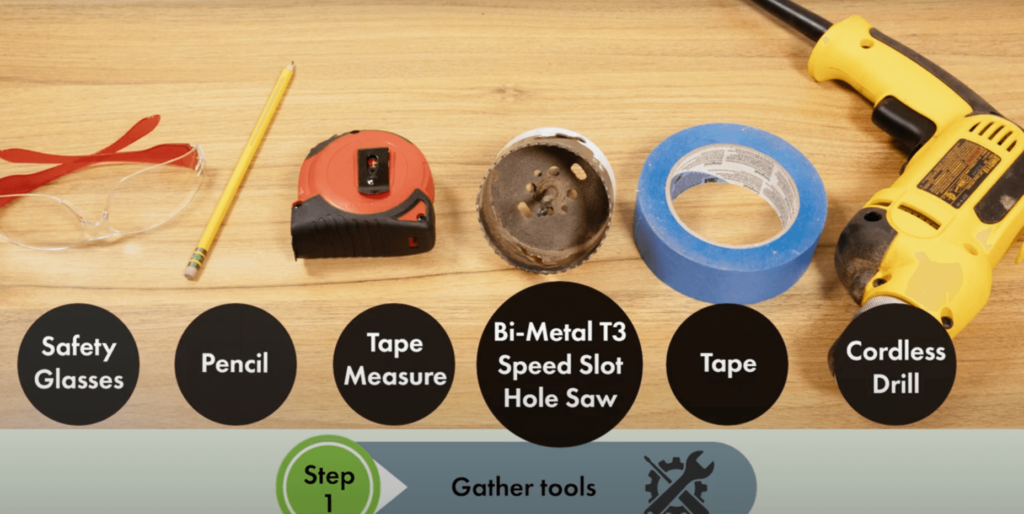
If you don’t feel comfortable with a drill, finding a professional is always a good idea.
Step 2: Measure and Tape
Use masking tape as seen in the video to help guide where the desk grommet will go.
Step 3: Measure and Mark
With measuring tape, create the perfect center point for where you will begin to drill.
Step 4: Drill Hole
Now that you know exactly where your desk grommet will go, start to drill the hole in the desk.

Step 5: Insert the Charger
The desk grommet charger can twist apart into two pieces. Simply feed the plug and device over the hole on the surface of the desk.
Step 6: Secure the Unit Under the Desk
Twist the bottom piece from underneath the desk to tighten and secure the desk grommet in place.
Step 7: Plug the Desk Grommet In
Hide the desk grommet wire behind your desk in a discrete area. An outlet nearby is essential. Plug in the device and voila!–you have a 5-in-1 charging station.
With your newly installed grommet, you can enjoy a clutter-free desk and smoother workflow, free from the frustration of tangled wires and unruly cables. Remember, a well-organized space fosters productivity and reduces stress.
Don’t hesitate to revisit this guide whenever you need to, and feel free to share it with friends or colleagues who might find it beneficial. Keep challenging yourself with DIY projects like this one to continually improve and personalize your space. Happy organizing!